
GitHub Pages is a free hosting service that lets you create and host static websites. CMS Hugo is a static website generator that helps you create websites using templates. In this tutorial, we’ll break down how to create and host a static website on GitHub Pages using CMS Hugo.
Installing Hugo
Hugo is a static site generator that you can use to create your own site. To get started, you need to install Hugo on your computer. In this section we will describe how to install Hugo on Linux, Mac OS and Windows.
Installing Hugo on Linux Ubuntu / Debian / Fedora / openSUSE / Solus
Install the Git and Curl packages if they are not already installed.
sudo apt-get update
sudo apt-get install git curl
Let’s install Hugo on Linux
Ubuntu/Debian
sudo apt install hugoFedora
sudo dnf install hugoopenSUSE
sudo zypper install hugoSolus
sudo eopkg install hugoCheck the installation by running the command
hugo versionInstalling Hugo in MacOS
Install the Homebrew package manager if it is not already installed
/bin/bash -c "$(curl -fsSL https://raw.githubusercontent.com/Homebrew/install/HEAD/install.sh)"Install Hugo with Homebrew
brew install hugoCheck the installation by running the command
hugo versionInstalling Hugo in Windows
- Download the Hugo installation file from the official repository, currently the latest version v0.110.0 https://github.com/gohugoio/hugo/releases/download/v0.110.0/hugo_extended_0.110.0_windows-amd64.zip
- Unpack the archive.
- Go to the folder with the extracted files and copy the path to the hugo.exe file.
- Open a command prompt and go to the folder where you want to install Hugo.
- Execute the command:
setx /M PATH "%PATH%;C:\path\to\hugo.exe\directory"Note: Replace “C:\path\to\hugo.exe\directory” with the path to the hugo.exe file on your computer.
Check the installation by running the command
hugo versionCreating a new website with Hugo
After installing Hugo, you need to create a new site. To do this, open a terminal or command line, go to the directory in which you will store the files of the site and enter the following command:
hugo new site site-nameInstead of “site-name”, you must specify the name of your new site. Hugo will then create a directory structure for your site.
Choice of site theme
Hugo comes with several built-in themes that you can use to create your own site. You will find all available templates on the official website in the Themes section. As an example, let’s install the theme terminal . Go to the root directory of your site
cd site-nameGo to the themes directory and download the theme archive, then unzip it and rename the unzipped directory to hugo-theme-terminal. You also can clone the repository by running the command
git clone https://github.com/panr/hugo-theme-terminalLet’s edit the file config.toml, which is located at the root of the directory and specify in it the theme we want to use, add the following line
theme = "hugo-theme-terminal"After that, you can start modifying templates and theme styles to customize them for your needs.
Creating records and filling the site
Now you need to create content for your site. As an example, create a new page:
hugo new posts/info.mdThis will create a new file named “info.md” in the “content/posts” directory. Open this file and add content to the page using Markdown formatting.
Important: Do not delete the text at the beginning of the file.
As an online editor you can use Dillinger or Stackedit.
Running a local server and checking the site
To check your site on the local computer, you need to run the server Hugo. To do this, run the command:
hugo server -DAfter starting the server, open your browser and go to http://localhost:1313/. You should see your site as it currently looks.
To run servers on a virtual server run the following command, in which replace 10.10.10.10 with the IP address of your server.
hugo server -D --bind 10.10.10.10 --baseURL http://10.10.10.10/Creating a repository on GitHub
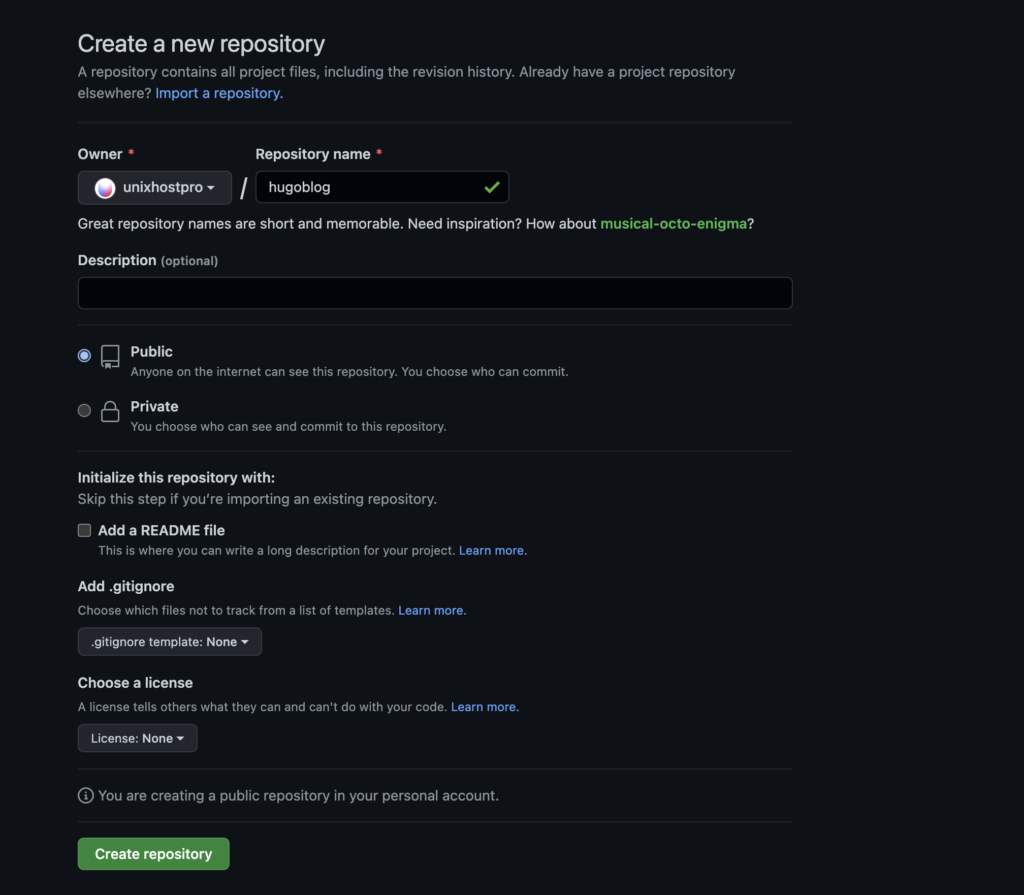
Now you need to create a new repository on GitHub for your site. Go to the GitHub site and login to your account. Click the “New” button and enter the name of your repository. Do not create the README.md, .gitignore, and license files, as they will already be included in Hugo.
Initializing Git and adding files
Now you need to initialize Git and add files to your repository on GitHub. Open a terminal and go to your site directory. Then run the following commands:
git init
git add .
git commit -m "Initial commit"
If you have cloned the theme repository, after running the git add command, you will see a notice that you need to run the git submodule add themes/hugo-theme-terminal command, and then run this command with a link to the theme repository instead of .
git submodule add -f https://github.com/panr/hugo-theme-terminal.git themes/hugo-theme-terminalAdding a repository as a remote repository and publishing to GitHub Pages
To publish your site to GitHub Pages, you need to add the repository as a remote and upload your changes to GitHub. Run the following commands:
git remote add origin [email protected]:username/your-repo.git
git branch -M main
git push -u origin main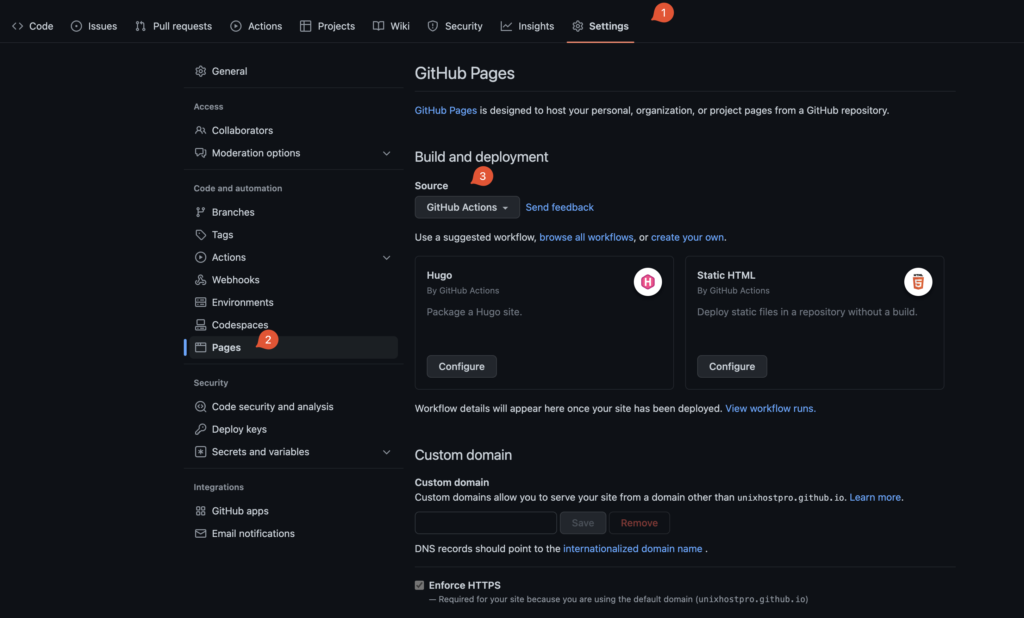
Then go to the settings section of your GitHub repository and select “Pages” on the side menu. In Build and deployment select GitHub Actions, then we will be offered a template for Hugo, click Configure.

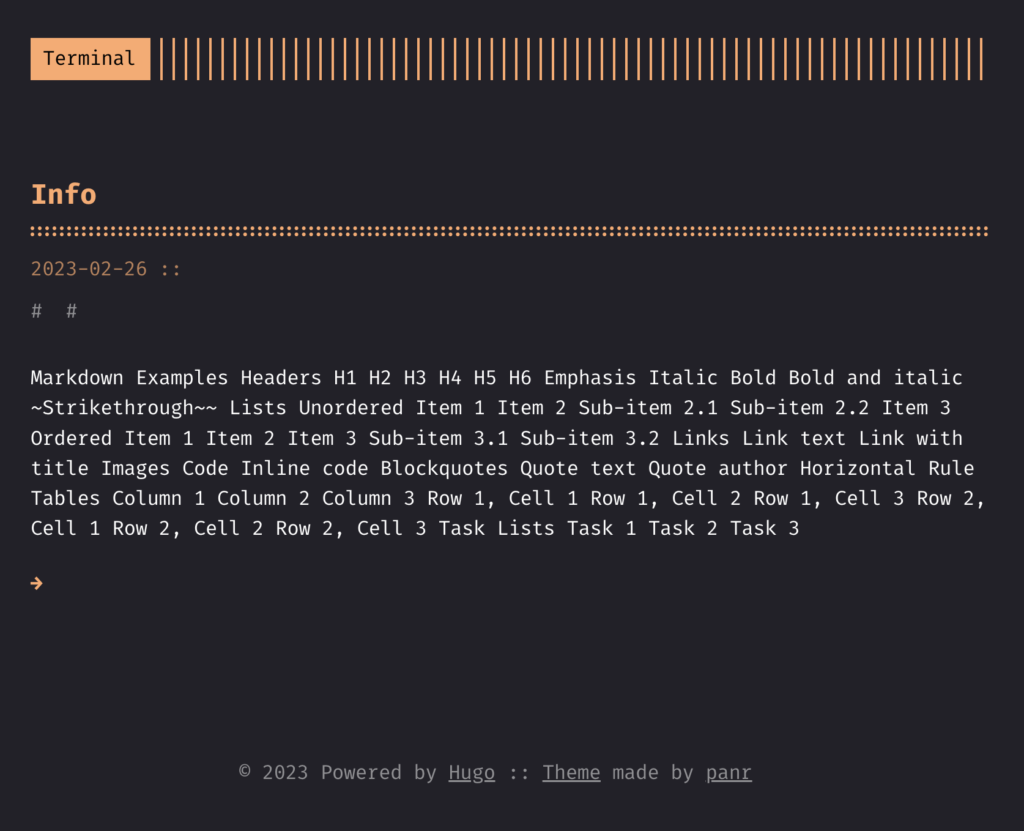
Click Start commit and if everything is done correctly, in a couple of minutes your site will be available at https://user-name.github.io/new-repo/ – where user-name is your user name on github and new-repo is the name of the repository you uploaded the files to.
Domain name setup (optional)
After you publish your site to GitHub Pages, you can customize your domain name so that your site is accessible at a shorter, more memorable address. To do this, follow these steps:
- You can buy a domain name on our website . It usually costs about $10-15 per year.
- Go to your domain settings and configure your DNS record. You need to create a CNAME record that points to the name of your repository on GitHub. For example, if your repository on GitHub is called “username.github.io”, you need to specify “username.github.io” as the CNAME value.
- Add your domain name to the CNAME file in the root folder of your site. If the CNAME file does not exist, create it and add only your domain name without http and www. For example, if your domain name is mywebsite.com, then the contents of your CNAME file should be
mywebsite.com- Save the CNAME file and commit and push to your repository.
- Go back to your repository settings on GitHub and find the “Custom domain” section.
- Enter your domain name in the “Custom domain” field and click “Save”.
- Update your DNS record with your domain name registrar to point to your site address on GitHub Pages.
- Check that your site is accessible by the domain name you set up.
Your site is now available under a more memorable domain name. Please note that setting up a domain name can take up to 24 hours to fully take effect.