What is Gitea?
Gitea is a free and open source Git repository management system that can be easily installed and run in a Docker container. Gitea provides a convenient web application interface for managing your Git repositories and various aspects of their development. Gitea can be used both locally and in a cloud mode.
Why use Gitea in a Docker container?
A Docker container allows isolating the application from the host operating system and its dependencies. This makes Gitea convenient to install, configure, and use on any platform and in any environment. Docker containers also provide scalability, ease dependency management, and enable more secure deployment and operation.
To install Gitea in Docker, Docker and docker-compose must already be installed on your server. For more information on how to install Docker + docker-compose + Portainer, you can read this article.
Creating configuration files
Create a folder where the docker-compose.yml configuration file and other Gitea-related files will be stored.
Create the docker-compose.yml file using a text editor and paste the following code:
version: "3"

services:
  server:
    image: gitea/gitea:latest
    container_name: gitea
    restart: always
    environment:
      - USER_UID=1000
      - USER_GID=1000
    volumes:
      - ./data:/data
      - ./custom:/app/gitea/custom
      - ./log:/app/gitea/log
    ports:
      - "3000:3000"
      - "2222:22"
Here:
image: gitea/gitea:latestspecifies that you want to use the latest version of Gitea available on Docker Hub.container_name: giteasets the name of the Docker container.restart: alwaysautomatically restarts the container if it stops.environment: - USER_UID=1000 - USER_GID=1000sets the user ID and group that will be used in the container.volumes: - ./data:/data - ./custom:/app/gitea/custom - ./log:/app/gitea/logdefines the location on the hard drive where Gitea data (./data), custom configuration files (./custom), and logs (./log) will be stored.ports: - "3000:3000" - "2222:22"specifies the ports that will be used to access Gitea. The first port (3000) is used for the web interface, and the second port (2222) is used to access the repository via SSH.
Starting the container with Gitea
Go to the directory where the docker-compose.yml file is located.
Start the container using the command:
docker-compose up -dThis will start the Gitea container in the background. The first launch may take a few minutes.

After launching, open a web browser and enter the address http://server-ip:3000 to access the gitea web interface. You should see the login page. Fill in all the necessary fields according to your configuration. In the Server Domain field, be sure to specify the IP address or domain name that points to your server.
If you specified incorrect values during installation, you can change them in the main gitea configuration file located at /data/gitea/conf/app.ini.
By default, the SQLite database is used, but if necessary, you can choose and configure MySQL or PostgresSQL.
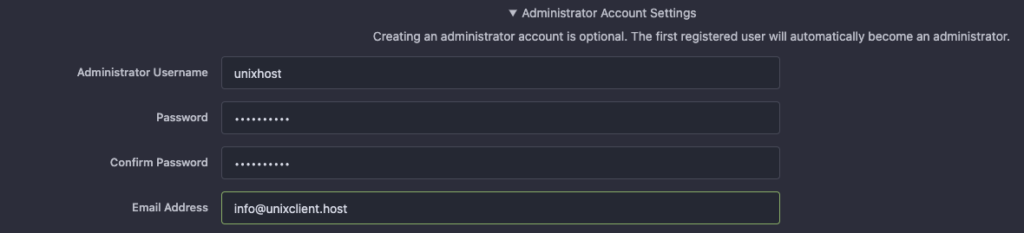
In Administrator Account Settings, be sure to specify a username and password for your administrator account.
After installing Gitea, we can begin creating our first repository.
How to use gitea
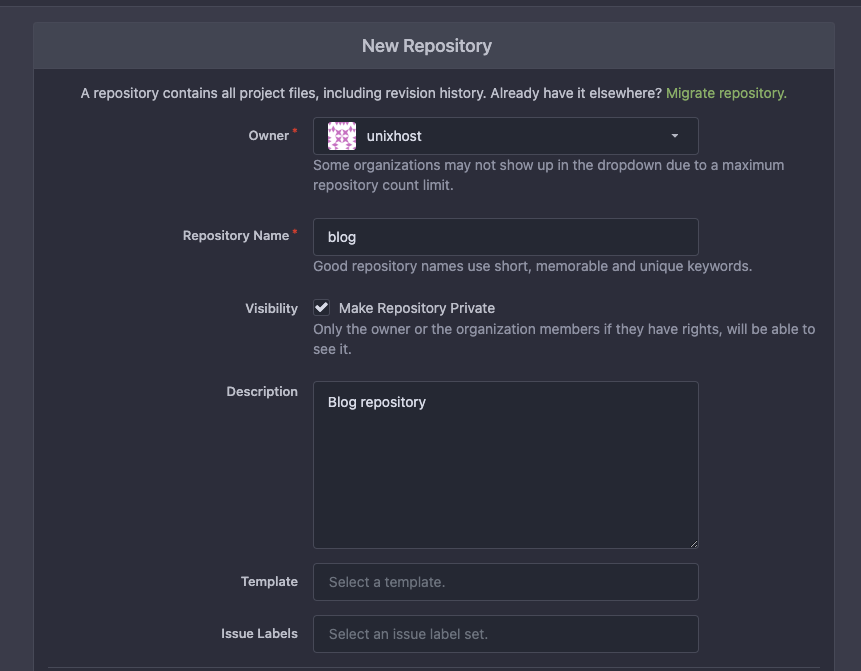
To create a new repository, select “Create a New Repository” in the menu and enter the repository name and description.
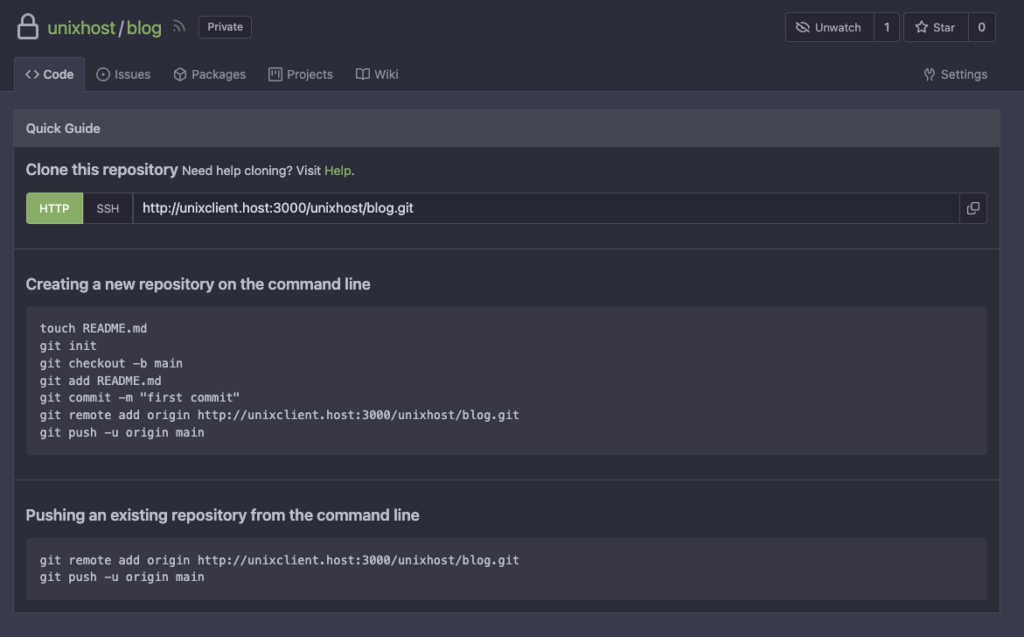
To clone a repository using SSH, you need to use port 2222 and the command
git clone ssh://<your_server_address>:2222/<username>/<repository_name>.git.To preserve gitea data when restarting or removing the container, it is necessary to save the data that is located in the ./data folder.
That’s it! You now have Gitea installed on your own server in a Docker container.
Updating Gitea in Docker
Attention
Before upgrading Gitea, be sure to make a backup copy of your data directory.
Before upgrading Gitea, be sure to make a backup copy of your data directory. To update, go to the directory where we have the docker-compose file and run the command
docker-compose pull
docker-compose up -d
VPS server for Gitea
Get full control over your repositories with VPS hosting from UnixHost.